It’s finally here! Spring is in the air and Click-A-Brick is bringing you some STEM:
Spring
Time
Educational
Methods.
And that STEM is all about the other kind of STEM:
Science
Technology
Engineering
Math.
We’ve hopped around the web, like a certain bunny who will be making an appearance in a few weeks, and have collected some amazing STEM activities to try this spring.
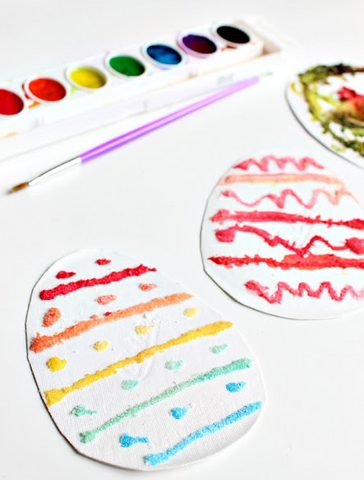
Salt Painting Poster Board Eggs

First up is salt painting, where you can create an amazing mosaic by painting individual grains of salt one at a time … just kidding. You don’t paint them one at a time. Can you even imagine how long that would take?!? It would be winter again by the time you were done. Who wants that?!?!?
This activity is courtesy of Amanda Boyarshinov with The Educators’ Spin on It. It is meant to teach kids about patterns and absorption.

What you’ll need:
- Poster board
- Paper
- Markers
- White Glue
- Salt
- Watercolor Paint (various colors)
- Paintbrush
Step 1
Cut the poster board into the shape of an egg.
Step 2:
Draw four eggs onto the paper and practice what pattern you’ll draw on your egg with markers. Explain to your child what a pattern is and help them to draw a couple.
You can use lines, squiggles, zigzags, dots and dashes to create a repeating pattern like:
- Line
- Squiggle
- Zigzag
- Line
- Squiggle
- Zigzag
Or whatever pattern you prefer.
Step 3:
When you know the pattern you want on your egg, make the pattern on the egg with glue.
Step 4:
Cover the glue with salt and then gently shake off the excess salt.
Step 5:
Explain that salt will absorb the paint and make sure your kids know what “absorb” means so they know what’s going on when they see it happen.
Have your child tap their paintbrush into some water, then gather up some of the watercolor paint and tap it onto the salt. The color will be absorbed and spread through the salt.
Keep painting until your pattern is complete and let the whole thing to dry overnight.
Real, Working Parachutes

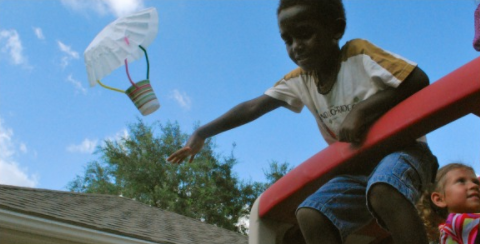
You won’t be able to jump out of a plane with these parachutes, but you can climb up somewhere high (but safe) and drop them and see how a real parachute actually works. You can teach your children about gravity and wind resistance with this activity.
This activity is courtesy of Leanna with All Done Monkey.

What you’ll need:
- Large coffee filters
- Markers
- Pipe cleaners
- Tape
- Lightweight cups made of paper, plastic or styrofoam
Step 1:
Decorate your cup however you want.
Step 2:
Ask your child to attach the coffee filter to their cup using the materials you have on hand. Little ones may need some help, but it’s preferable if they can figure it out themselves. You may need several coffee filters and cups for them to get it right, but eventually, they should be able to connect about three or four pipe cleaners to the cups and filters using tape or by punching holes in them. As long as they stay together, whatever works is fine.
Step 3:
Find somewhere that you can safely drop your coffee filter parachutes from and watch them float to the ground. For even more fun, get a lightweight passenger, like a mini action figure, to sit in the cup for a fun ride down.
Chromatography Flowers

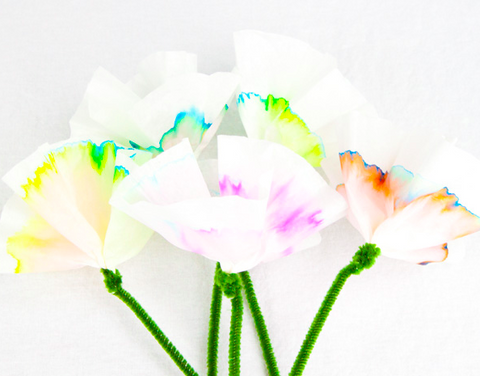
We all know how much fun it is to combine colors to make other colors, but what about separating colors to see what colors they are made of? This activity uses science and a dash of art to create beautiful springtime flowers while also showing kids how some colors are a combination of other colors mixed together.
The activity comes courtesy of Shelley at 123 Homeschool 4 Me.

What you’ll need:
- Coffee filters
- Water soluble markers in secondary or tertiary colors (not primary colors)
- Green pipe cleaners
- Water
- A small pipette or syringe
Step 1:
Flatten out some coffee filters
Step 2:
Draw a circle in the middle of your coffee filter or create a simple pattern. This is a good time to explain to your child what secondary and tertiary colors are and the difference between them and primary colors.
Step 3:
Take your pipette or syringe and drop about 0.5 ml of water at the center of your filter and watch.
As the water travels along the filter, the secondary or tertiary colors should start separating into the colors that they contain. This is because the molecules of the different colors move across the filters at different rates, causing them to separate.
If you want the colors to spread further, add another drop of water. Allow the filters to dry completely.
Step 4:
Make flower shapes with your filters and connect them to the pipe cleaners. You now have a beautiful bouquet of spring flowers made with science!
Get your kids in the spring STEM frame of mind with these three wonderful activities. And, when you’re done that, grab your Click-A-Bricks and make a flower out of them!


Comments