


We already know what you’re thinking: What in the name of Santa’s Workshop is a toque?
It’s known as a winter hat in some parts of the world. No matter what you call it, though, they’re essential cold weather wear. They keep your ears warm and toasty and your head heated and happy.
But this little craft tutorial is not about making actual toques. It’s about making mini-toques that you can use as Christmas tree ornaments and it’s courtesy of the EasyMeWorld YouTube channel.
Step 1: Gather the following:
- a Christmas wrapping roll (or a toilet paper roll)
- scissors
- scrap yarn of at least two different colors
- a book that is about 9” or so tall

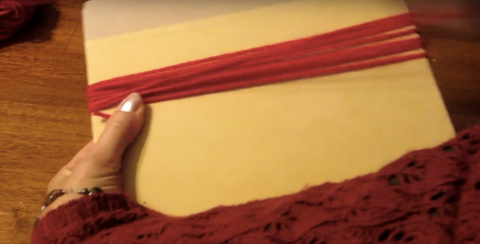
Step 2: Take some yarn and wrap it lengthwise around the book (about 15 times or so).
Step 3: Cut through all the yarn on both ends of the book so you end up with two piles of yarn. Combine the same-colored yarn into one pile.

Step 4: Repeat the process with yarn of a different color.

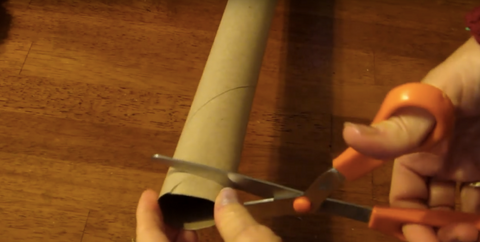
Step 5: Cut a half- inch off the end of the Christmas wrapping or toilet paper roll so you have a small circle of cardboard.
Step 6: Take a piece of yarn and make a loop with it by folding it in half.

Step 7: Put the loop through the cardboard circle.

Step 8: Take the two ends of the string that is folded in half and put them through the loop and pull them tight so the string is wrapped around the cardboard.

Step 9: Repeat with a string of a different color so it is tightened beside the first one. Continue this process, alternating colors, until the cardboard circle is covered with string.


Step 10: Take a string and make a loop by folding it in half and tie a knot in the end. This is the loop you will use to hang your toque on the tree. Make the loop as long as you like.

Step 11: Take your circle and push all the string ends up through the circle.


Step 12: Make sure all the strings are pulled through and straightened.

Step 13: Take the string with the loop and tie the loose ends around all of the strings on the circle. Tighten it as much as you can and tie two knots to make sure it stays on. You should now be able to see the toque.

Step 14: Fold the loop down and hold it with your circle.

Step 15: Gather the rest of the loose string ends into a bunch and cut them into a rounded shape. This will be the pom pom on your toque.

You are now done! Hang you your hat on your tree, give it to someone as a gift, put it on your Barbie’s head to keep her warm or (and this is what we recommend) put it on your Click-A-Brick creation to keep it warm.

We hope you enjoyed this festive craft tutorial courtesy of EasyMeLife on YouTube.
Merry Christmas!
JOIN THE FUN CLUB
Comments