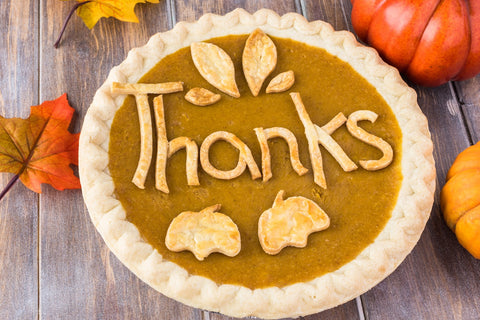
Thanksgiving is next week and here at Click-A-Brick, we’re thankful that there are so many fun crafts to make. Crafts are the best and we always have a great time sharing them with you. Wow your family with these amazing ideas and make the holidays even more special.
Coffee Cup Mayflower
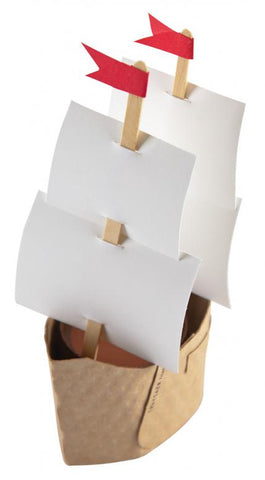
This model of the Mayflower uses a to-go coffee cup, a cup holder and a couple of stir sticks. It comes from Parenting.
- Cut the bottom off of a to-go coffee cup.
- Make a tiny slit (just big enough for the stir stick) at the top of cup bottom and then another one at the bottom of the cup bottom on one side of it. Then, cut those same two slits on the opposite side of the cup bottom.
- Place the cup bottom in the center of the cup holder with the bottom of the cup facing upwards.
- Take the rest of your coffee cup and cut two large rectangles and two small rectangles out of it. (You can also use a separate piece of construction paper if you prefer.)
- Make a slit just large enough for the stir sticks in the top and bottom of each rectangle.
- Put the stir sticks through the slits of the rectangles.
- Then, put the bottom of the stir sticks through the slits in the upside-down cup bottom.
- Cut out some flags in a different color of paper and glue them to the top of the stir sticks above the rectangles of paper.
You now have a model of the Mayflower!
Rolled Paper Pumpkin
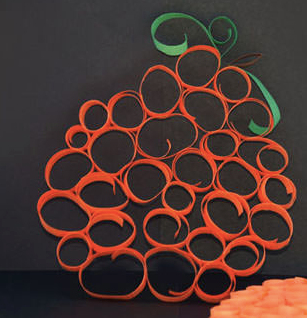
Thanksgiving and pumpkins just go together so nicely. This fun and easy craft is a breeze to make and will look so cute hanging in your house. It’s courtesy of One Creative Mommy. All it takes to make is some orange, green and brown paper, some scissors and some glue.
- Cut up a sheet of orange construction paper into strips about a half-inch wide. Cut varying lengths of strips. Also, cut a few strips of green and one of brown.
- Roll the orange strips into circles. Try not to make them the same diameter. It’s better if you have various sizes of circles.
- Glue the circles so they are closed.
- Once you have about 30 or so orange circles glued closed, arrange them in a pumpkin shape and then glue the paper circles to each other in the pumpkin shape you’ve made.
- Roll up the few strips of green paper you have, but don’t glue these circles closed. Just let them straighten back out a bit so they are curved. Glue these pieces all in the same spot at the top of your pumpkin so they look like leaves.
- Take your one brown strip, roll it into a circle and flatten it. Glue it closed and then glue it in the middle of the green pieces of paper so it looks like a stem.
You now have a rolled paper pumpkin!
Melted Crayon Pumpkin
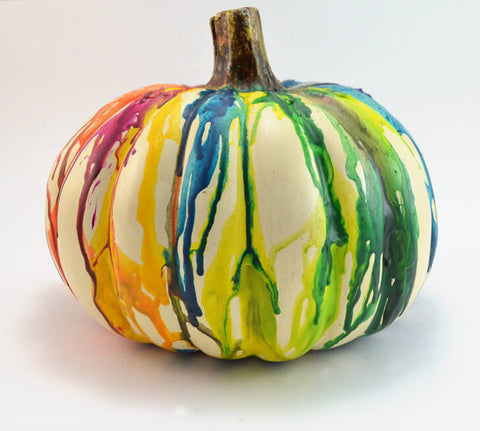
Get colorful this Thanksgiving with this melted crayon pumpkin from Dream a Little Bigger. Use a real white pumpkin if you can find one or buy a white faux pumpkin so you can store it from year to year and reuse it.
- Lay down some kind of drop cloth.
- Get a pack of Crayola crayons and peel the paper off of them.
- Glue the crayons onto the pumpkin.
- Get a blowdryer and heat the crayons so they melt.
- If you have areas that didn’t quite get covered, glue more crayons onto the pumpkin and repeat until you are satisfied.
You now have a super colorful melted crayon pumpkin!
When you’re done making crafts, grab your Click-A-Bricks and see what else you can make for Thanksgiving. Can you make a Mayflower with building blocks to match your coffee cup one? Can you make a pumpkin?
Have fun this Thanksgiving!

JOIN THE FUN CLUB


Comments